WEEKLY PROJECT #7 & #8 – ENCAUSTIC PAINT
 To help spur some creativity, I have purchased a book on Amazon called, “Creative 52: Weekly Projects to Invigorate Your Photography Portfolio
” by Lindsay Adler. This book provides a new project each week. It is written by a fashion photographer, so I expect to start shooting more portraits than I have in the past. This alone is a departure from my regular subjects of landscapes and still life.
WEEK SEVEN AND EIGHT: COLLABORATIVE PRINT
After an extended layoff due to some much needed surgery, I’m back on track and finished up a project this week. I actually combined 2 projects into 1 so that I could get caught up. Week 7’s task was to “Go Beyond the Print or Digital Image” and week 8 asked me to “Collaborate With Another Artist”. The artist that I worked with this week was the multi-talented Cindy Chinn. She had recently purchased some encaustic paints to work with. We came up with a plan to mount some photos to a wood board and coat them with these wax-based paints.
Here’s a link to the photos that I used: Encaustic Kitchen Gallery.
The first thing to do was to get all of my materials in order.
- Wood board
- Photo
- Cookbook pages
- Label
- Glue
- Encaustic Paint
- Heat sources
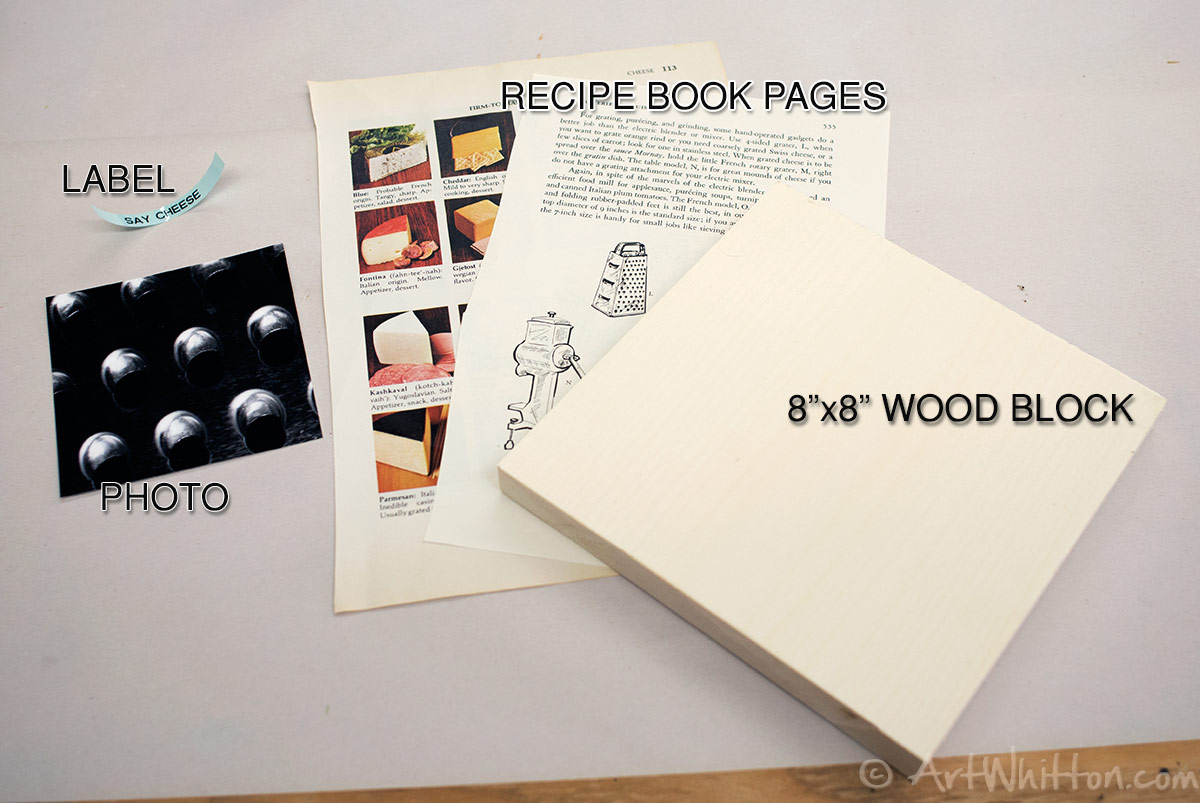 The photos I took were of a variety of kitchen utensils. The plan is to mount the cookbook pages onto the board, then mount the photo and label on top of the pages. Then I’ll coat the whole thing in encaustic paint and wax.
The board is just a piece of smooth alder. The label is from a label making device. The photo was printed off the little Epson 810 printer we have in the studio. All of these things are readily available if you want to ‘try this at home’.
I used a standard wood glue to adhere the pages to the board. I tried to carefully wrap the edges, but still tore it one area. Cindy helped fix that up for me. When you do this, you might find that the paper wrinkles up as it gets wet from the glue, so you need to keep with it until it dries and smooth out any wrinkles that appear.

In this example, I’m using a photo of a cheese grater, so I found two related pages from Cindy’s old Betty Crocker cookbook.
With the pages glued and dried and (fairly) smooth, the base is ready for the next phase. I attached the photo to the pages using the same glue. It curled up fast and almost ruined the photo, but I managed to get it on nice and flat. I eyeballed the location and tried to get it centered. I attached the self-adhesive label and had everything assembled.
 Now the project is coming together. I am ready for paint!
For those not familiar with encaustic paint (like I wasn’t when I started this project), it’s a wax based paint that needs to be heated and melted before you can use it. It’s a wax with paint pigment combined into it. In talented hands it can give some great effects. I will not be showing detailed painting in this post. Cindy is using the paint on her mask sculptures to achieve a translucent look.
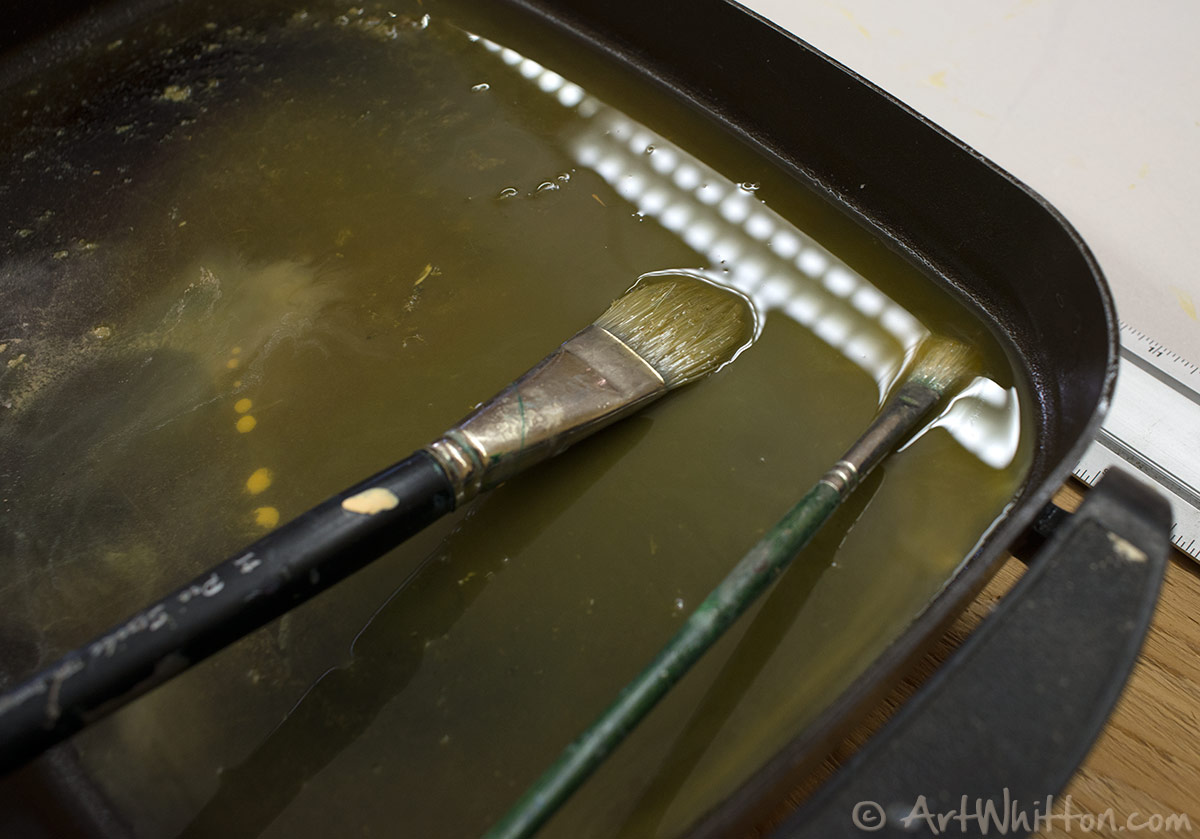 We heated up some wax and after doing a few of these pieces we ended up with a slurry of colors to use as the base coat. This base is mostly wax, but has a green/yellow tint to it from the variety of colors we washed off the brushes.
I had to work quick to keep the paint fluid and moving. It cools quickly and I wanted to get a nice first coat down to cover everything. I painted the top and sides and had some runoff that I trimmed up later.
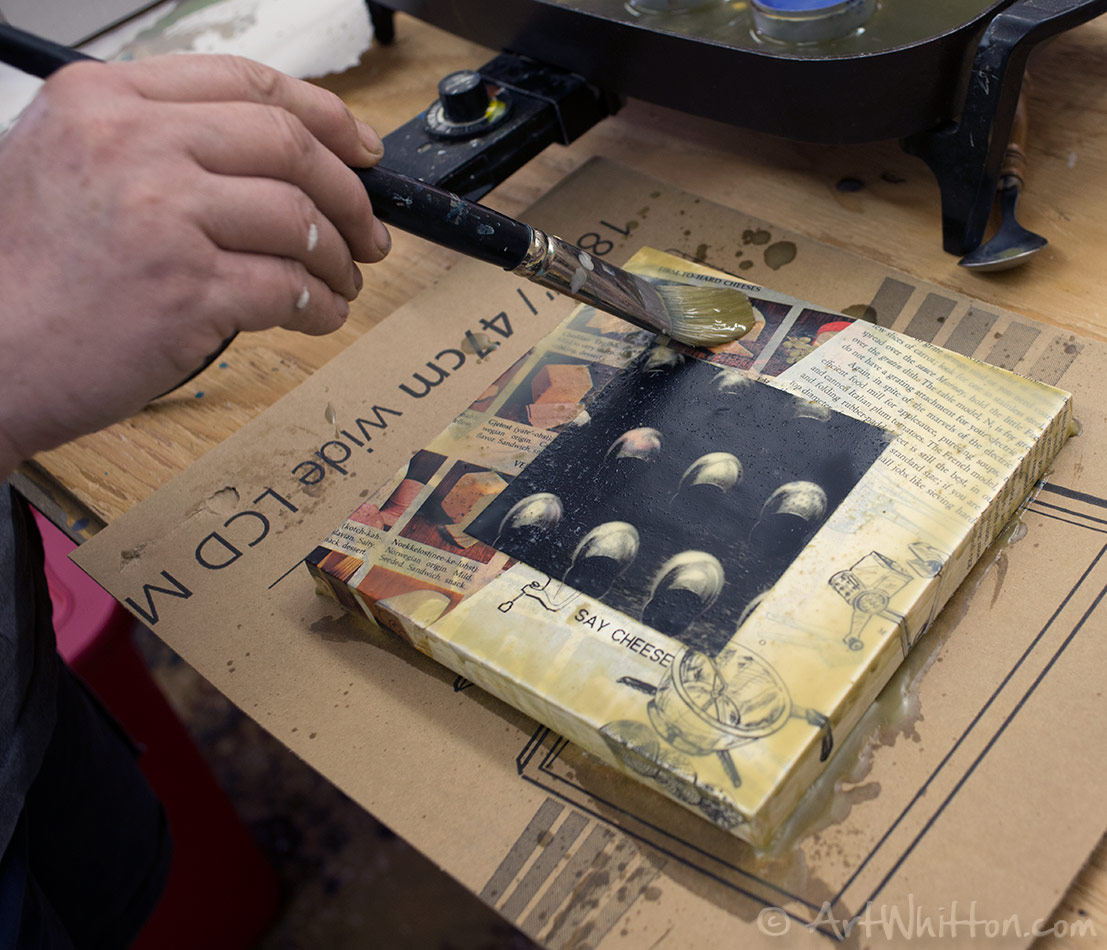 As this wasn’t detailed work, I just used an old brush. One problem I found was that we had a buildup of sawdust in the paint. I should have cleaned it out as we worked on it, but I ended up with more ‘texture’ than I was planning to have.
I applied a generous amount to the piece and made multiple layers. I ended up with a nice thick coat that covered everything. I had a small issue with the paint getting under one end of the label. Time to let it cool before the next stage.
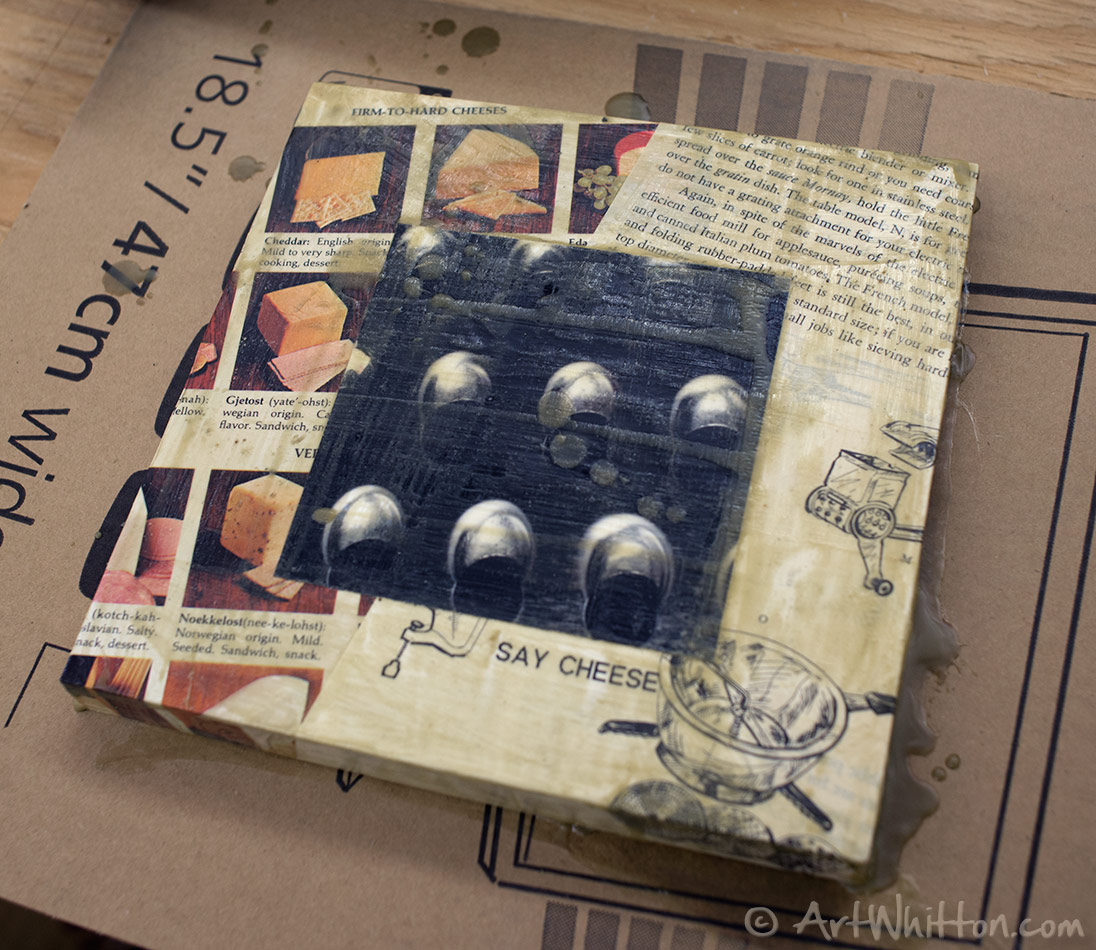 Here is the piece with the base coat. There’s not a lot of color, but it has sealed in the pages and the photo and the label. It looks a little rough as I put the waxy paint on in a hurry as it dried.
Next I wanted to smooth it out a little. To do this we used a heat gun. We tried a couple, but found that this one from Harbor Freight did a better job. The goal is to have enough heat to melt the paint into a smooth surface, but not too much air movement to blow the paint around or off the base.
It took some trial and error to get the right touch of heat, air force and most of all the right movements to keep the heat moving evenly around the board.
It’s also tough in some lighting to see when the paint is soft and catch it before it becomes liquid and runny.
 This photo to the left shows the heat gun melting the wax. You might not want to put quite so close as this. I shot this more to frame the gun and block together rather than show the actual working distance.
After about 5 minutes of heat, I was able to keep some of the paint on the board. I applied some more paint and repeated the heating process until I had a fairly smooth surface.
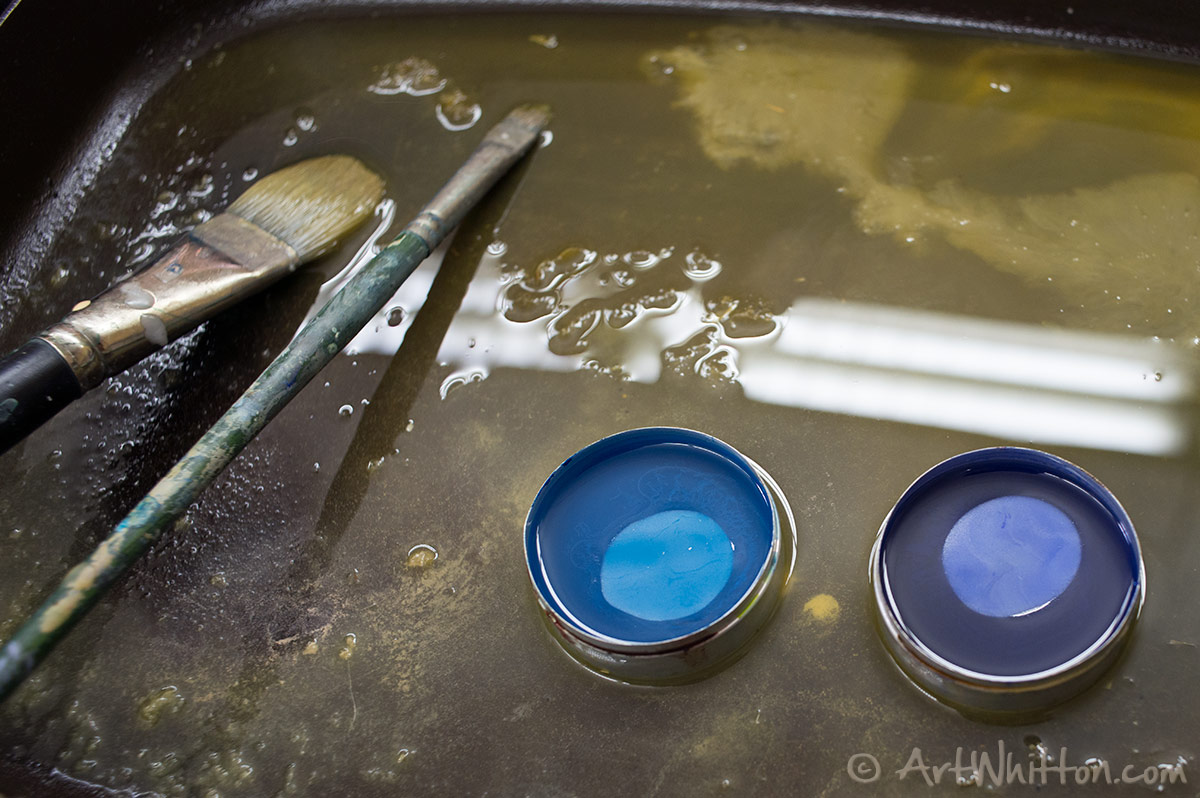 Now I was ready to start adding some design to the piece. I’m not an painter so I wanted to keep things simple. I selected two different blue paints that I thought would work well together. These come in small tins that can be placed in the skillet and melted to a liquid form.
 Here is the piece after I added the color. I used cardboard to mask off the photo and to help keep my lines straight. Even so, it was difficult to get a nice smooth line with the brushes I was using. (Yes, I’m blaming it on the brushes!)
The heat gun was brought out again to smooth the paint down a little. At this stage, it was more important to make sure that I didn’t blow the paint across the board.
I repeated this step with some red paint and added a few drops. I heated the surface a final time and then trimmed some of the excess wax/paint that had pooled at the bottom. I smoothed out the edges with a soft cloth covered sponge and called it a day.
Here is the final piece ready to be hung.
 Thanks for reading – if you have any questions or comments, just let me know below or send me an email.
[…] post by Art Whitton explains a similar process to how I did […]