 I’ve been to Washington DC a number of times over the years, but it was usually work related, or I had some other distractions that kept me from going ‘full blown photographer’ on the city. In November 2015, I had a week to spend there with only minimal requirements of my time. (View Part 2 here)
View any image larger by clicking on it.
I was there with my brother who was visiting for the first time. Later a friend joined us who had visited many times in the area. We used the Metro system to get around and were able to see many of the popular sites. We spent a lot of time on the National Mall and in the Dupont Circle neighbourhood.
One of the big challenges of photographing DC is that every site is crowded with tourists who also ‘photographing DC’.  These days, everyone is a photographer and has their arms reaching out with their camera for a selfie (not that there’s anything wrong with that). But instead of a natural looking crowd shot, you get a lot of people in an unnatural pose. So you learn to pick your spots and timing.
Another challenge is that many of the sites in DC are big, huge in fact. This means that you’ll want a wide angle lens for many of your shots. I shot a lot with a 28mm lens with a polarizing filter on it. I had brought my 28-70 2.8 zoom lens, but the zoom ring locked up about 1/2 hour into the trip. Always have a backup plan! Thankfully I had brought my 20mm, 28mm and 85mm lenses. I also brought along an 18-200 APS-C lens to lend my brother for the trip. Every now and then we would swap lenses if I wanted to try a shot with extra ‘reach’.
One concern I had about traveling to DC in mid November was the weather. Thankfully this was one concern that wasn’t needed. We had great weather for most of the week, with blue skies on most days. I’ve been caught in the rain in DC a few times and it can be a long run to dry sanctuary. Keep this in mind if you’re visiting. I’ve had to hold a soaked camera under a soaked t-shirt under the entrance of the American History Museum; it’s not fun.
But with weather aside, and my lens selected (28mm on a full-frame D800e) I was ready for the city.
NATIONAL MALL AND MEMORIALS
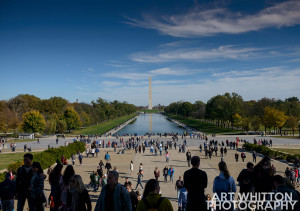 One of the top attractions in the city is the National Mall and the various memorials along it. In this section, I shot during the daytime, but below you’ll see another section for shooting at night.
On this trip, there was a lot of construction on the mall, the Capitol Dome was covered in scaffolding, a lot of grass was torn up for reseeding, construction on the National Museum of African American History and Culture was in full swing and there was more construction next to the World War II Memorial. Add in the crowds for Veteran’s Day and it was a nice challenge to work around this and try to maintain a sense of composition.
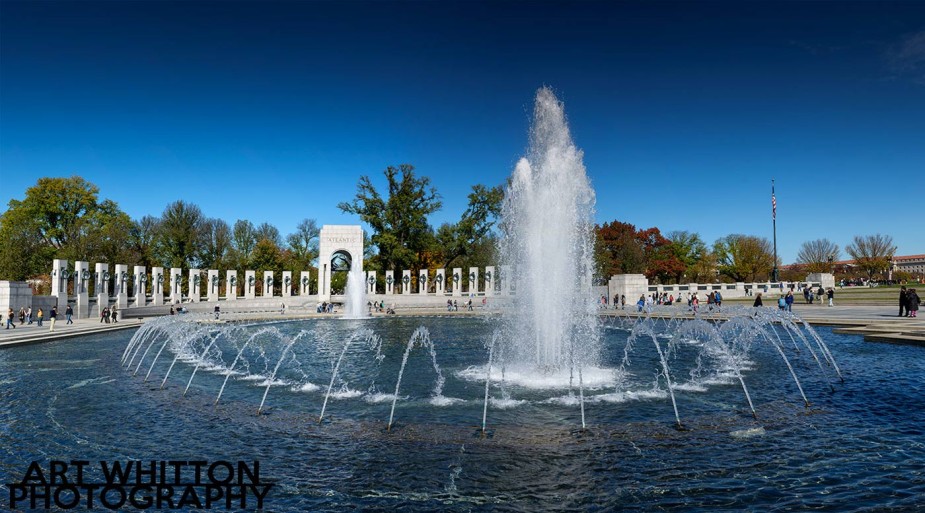
Below is a panoramic (3 combined images) of the World War II Memorial. Just to the left there was a lot of construction and a tall crane. I got close to the water to keep people out of the foreground and kept them to the perimeter of the shot. I used the polarizing filter to get a rich blue in the sky and water. All of the daytime shots are handheld as I didn’t want to bother with a tripod on long walks and around crowds. I traveled light during the day with just a camera and lens.
Here’s another shot of the same memorial. I pointed the camera up to avoid people in the shot and still got a nice composition.
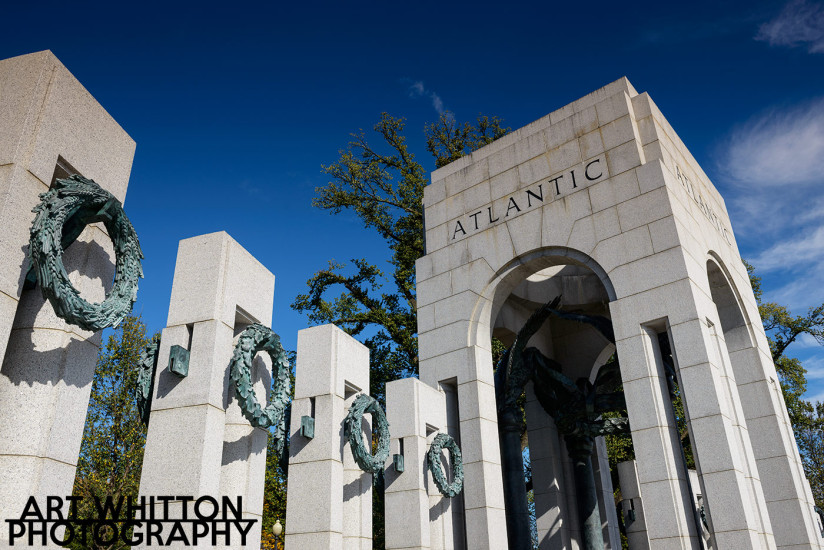
And finally here is a third shot of the World War II memorial. In this example, I’ve selected a more intimate look at it tried to convey more of the meaning behind the memorial than just getting an overall view.
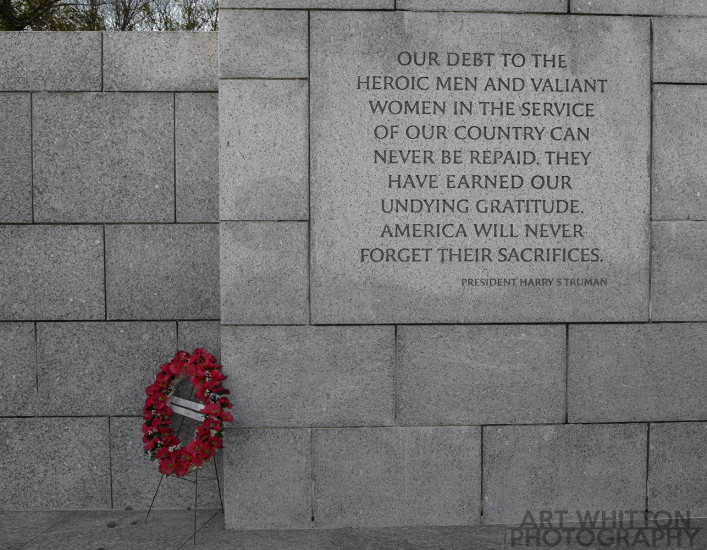
This is also and example of how I have edited the photo to a ‘near’ selective color image. I toned down all of the colours but the red poppies in the wreathe. I’ve tried to balance the composition between the red in one corner and the large block of text opposite it. The third element of the trees and skies is left in to remind me that there is still so much more out there.
The most noticeable monument on the Mall is the Washington Monument. This 555 foot tall obelisk can be seen from almost anywhere along the Mall. If you get up close to it, you can shoot it by looking straight up, or you can move back a little and include some of the flags that surround it. I shot it from many angles, but in the end I like this one the best as it shows the majestic height of the monument as it towers above the rest of the area.
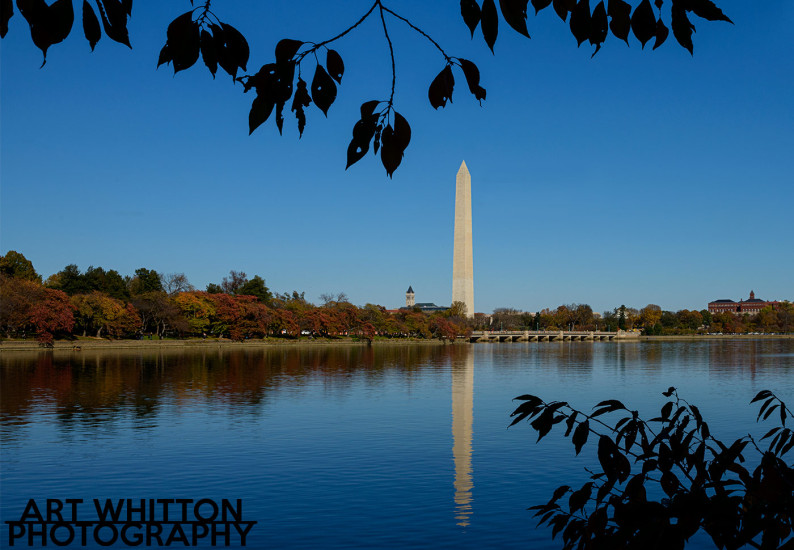
This was shot near the FDR Memorial across the Tidal Basin on the walk to the Jefferson Memorial. Once again the polarizing filter helped me get some rich blues. I framed the Monument with branches from the trees along the way. I took a lot of shots along here and liked this one best. I like the framing, the reflection and the fall colours along the left side.
Speaking of the FDR Memorial, it’s a large sprawling site with many photo ops. One of my favourite photos from the trip was the one below. A little girl was ‘cleaning’ off the statues with a small branch. Sadly, her dad called her back so that she would not be in the way of “the guys taking photos”.
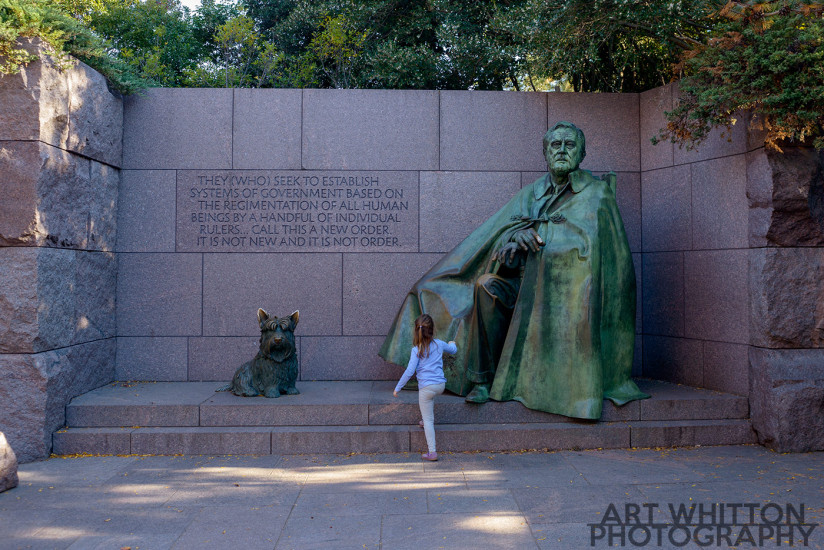
I like this photo because it adds a great human touch to the Monument. It’s great to see a young child ‘caring’ for the national monument. It also provides a sense of scale to the image and make FDR appear ‘larger than life’. It helps to have your camera ready for moments like this.
It was a long walk to the Jefferson Memorial, but it was one that I had not visited previously, so it was on my list this trip. Aside from getting some fresh air away from the crowds and shooting along the Tidal Basin, the walk allowed me time to reflect on the other memorials and take a mental break for a few minutes.
We got the memorial towards the end of the day and light was bright on the south side. There were crowds of course, but mostly to the front of the Jefferson statue. With these two factors in mind, I decided to shoot toward the north, from the back of the statue and include the crowds. I created a four shot vertical panorama image to get as much in as I could. I wanted to include the statue, the crowd and two panels that contained Jefferson’s quotes.
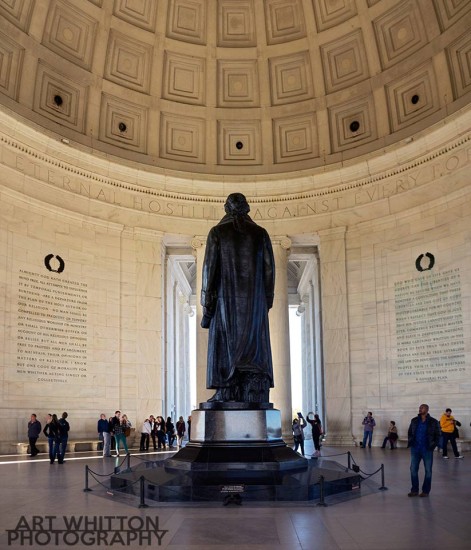
I tried to make the image as symmetrical as I could. Exposure was tricky as the statue is quite dark compared to the rest of the Memorial. To get the dark statue exposed bright enough to show some detail, you can’t help but overexpose the outside areas (which I tried to keep to a minimum).
One of the most popular sites on the Mall is the Lincoln Memorial. As you can see from the image at the top of the page, it’s crowded – day and night. If you want to get a shot Lincoln on his own, you’ll need to get close and have a wide angle lens. The image below was shot around mid day on a crowded Sunday, yet the statue looks majestic, alone and conveys the seriousness of the subject.
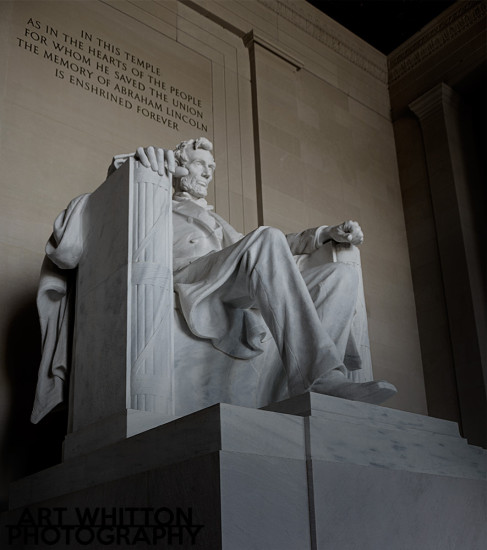
For this shot, I’ve added some vignetting along the bottom and right side to draw more attention to his face and the quotation above his head. In the original exposure the block at the bottom was well lit and drew attention away from the figure.
There is one memorial that always hits me hard. Although I have no real connection to the Vietnam Veterans Memorial, I still get choked up each time I visit. The one thought I have as I walk along it is that there are too many names. It’s easy to forget the cost of war, but the Wall brings it to the forefront.
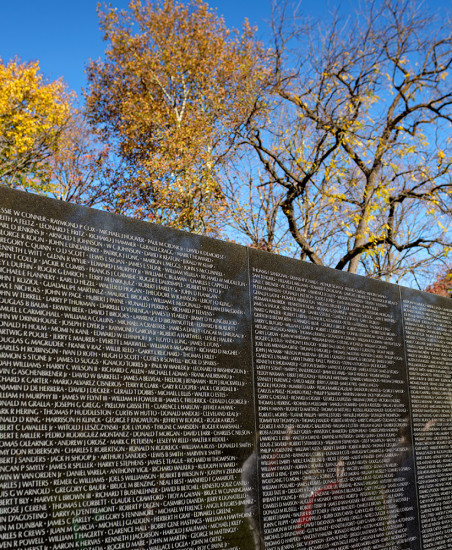
I don’t normally take photos as I walk along the Memorial, but in this instance I was struck by the names next to the trees and I thought of the similarities between the numbers of fallen leaves and fallen men. I cropped the left, right and bottom to imply the endless list of names engraved on the Memorial.
One of the tougher memorials to photograph (in my opinion) is the Korean War Veterans Memorial. It’s in a mix of light and shadow, rather spread out and an odd shape (triangular) plus there is a chain link fence around it. I tried a number of approaches, angles and views. In the end I decided to edit a close crop of one my wide angle images.
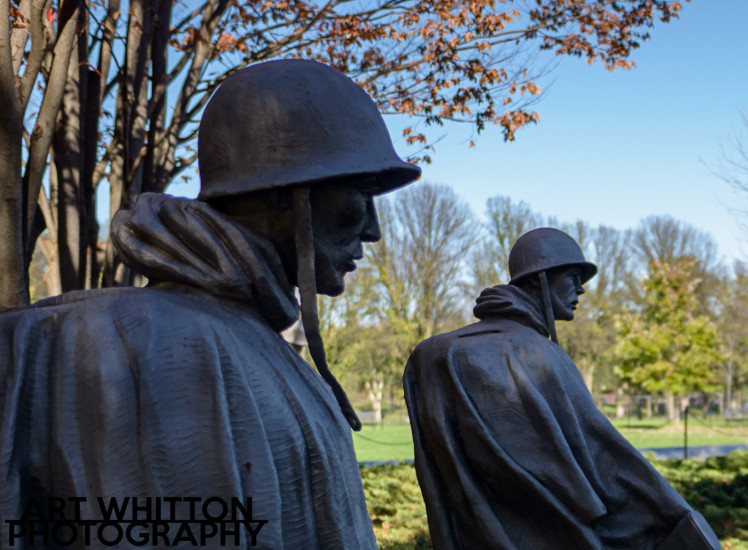
I’m not totally happy with this one. I think the bright sunny background detracts from the feel of the memorial which is a squad of soldiers on patrol, likely in the rain (due to the covers they’re wearing). Not a successful photo in my book.
I took another approach by shooting the United Nations wall across from the statues. The granite wall has people from the many countries that participated in the war etched in it and reflects the statues.
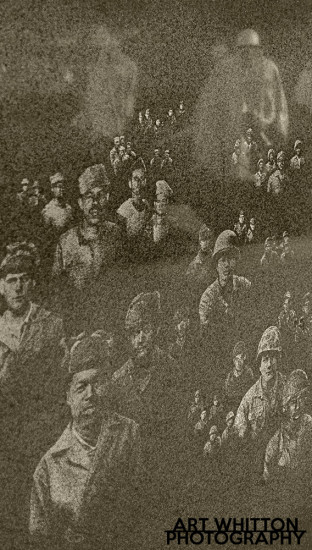
I find that this image better conveys the memorial as it shows the international effort that went into the war and include the reflections of the statues towards the top. I changed it from a color image to a sepia monotone to balance and subdue the colours. This image is also cropped from a wide angle shot.
SHOOTING THE MEMORIALS AT NIGHT
My main photographic goal this trip was to spend an evening shooting the memorials at dusk and night time. I bought a small travel tripod (Slik Able 340DX Tripod) and head (Pergear Ballhead
) just for the trip. This combo was just a little over $100 and did the job quite well.
I’ll start with the popular Washington Monument. As we walked towards the Mall, it was dusk and there was a beautiful blue twilight sunset happening. It was perfect for creating a silhouette of the tall monument.
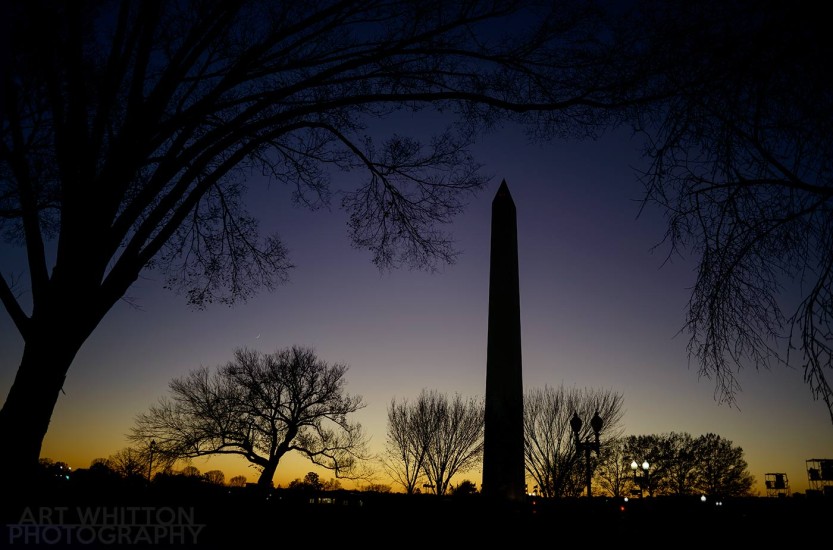
I was able to get more shots as we got closer, but I really liked how the trees framed the monument in this image.
We walked along the Vietnam Memorial Wall again and the memorial took on a more somber feeling at night. I took different approach this time. I changed to my 85mm lens and got lower. The darkness allowed me to use a longer (30s) shutter speed and get the flag blowing in the soft breeze.
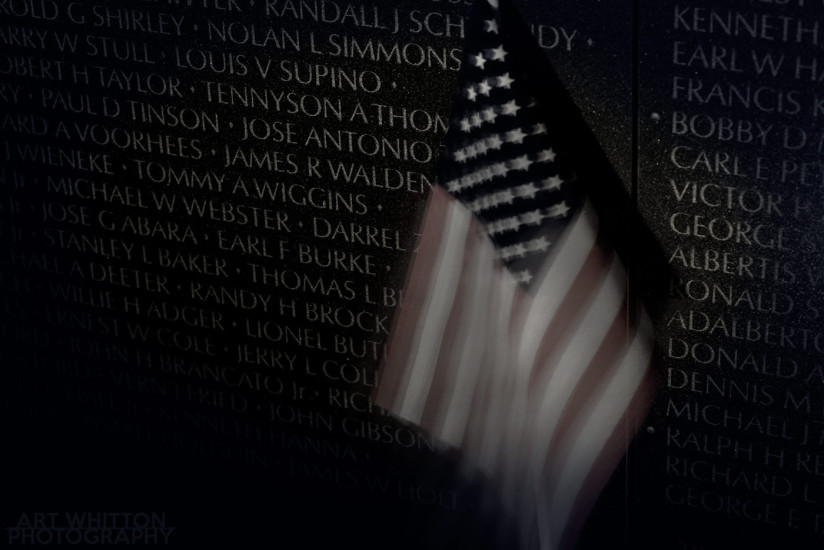
I added some vignetting and lowered the saturation to make this a darker, more focused image than was originally shot.
Another memorial near the Wall is the Vietnam Women’s Memorial. This is a touching statue that shows 3 women tending to a wounded or dying soldier. There’s a lot going on in this sculpture, but at night, it was a little dark to make out a lot of detail. As I walked around it, I found a great composition of one of the figures looking towards the light.
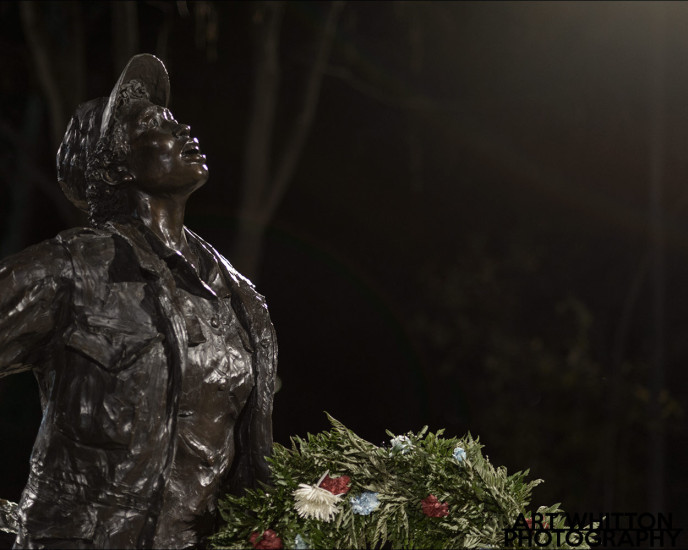
I handheld this shot to get the angle I wanted and really liked how the elements of the statue, the light and the wreathe all came together. I think I captured the emotion of the sculpture while showing only a portion of it.
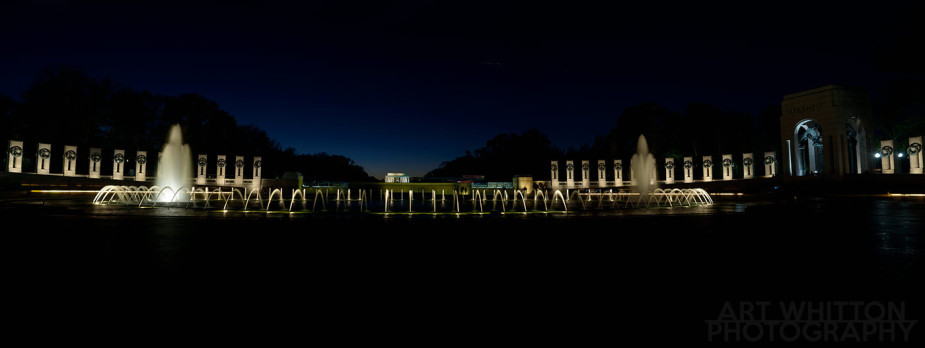
At night the World War Two Memorial looks much different. It has beautiful lighting and the fountains stand out in contrast to the night. I shot a 4 image panorama to capture most of the memorial. At night, the unsightly construction equipment can’t been seen, so I could shoot to the west and view the Lincoln Memorial.
A little off the Mall, you can find the Martin Luther King Jr Memorial. It’s a large sculpture that show a large mountain with a section taken out of the middle. The inscription on the middle section reads “Out of a mountain of despair, a stone of hope” a quote taken from MLK’s famous speech given on the steps of the Lincoln Memorial.
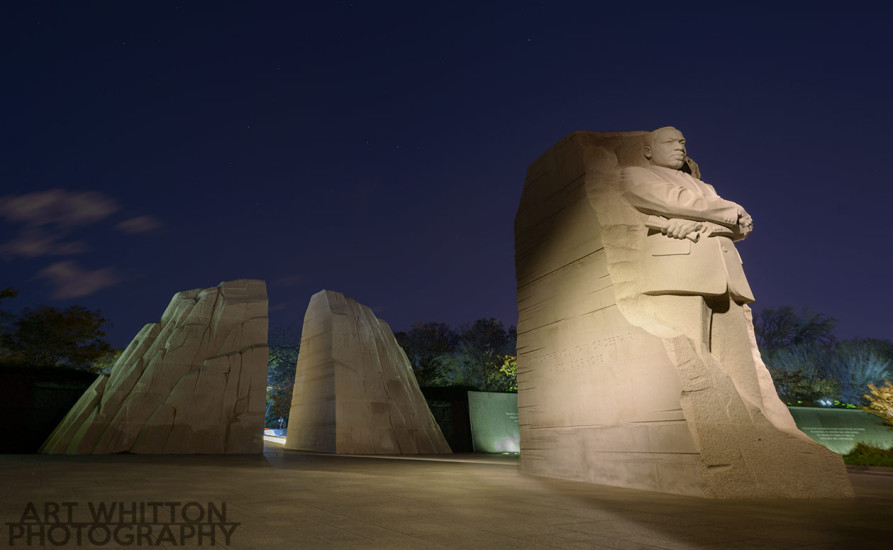
This was a tough one to shoot as the central sculpture was brightly lit, while the parts further back were dimly lit. It forced me to make two exposures and then combine the two into one image that is more evenly lit. I exposed the back area for 30 seconds and the front area for 2 seconds. The long exposure can be seen in the movement of the clouds on the left.
Shooting the Lincoln Memorial at night can be tough. It’s still crowded (not as much as during the day) and the lighting can be tricky as there are multiple light sources with multiple colour temperatures.
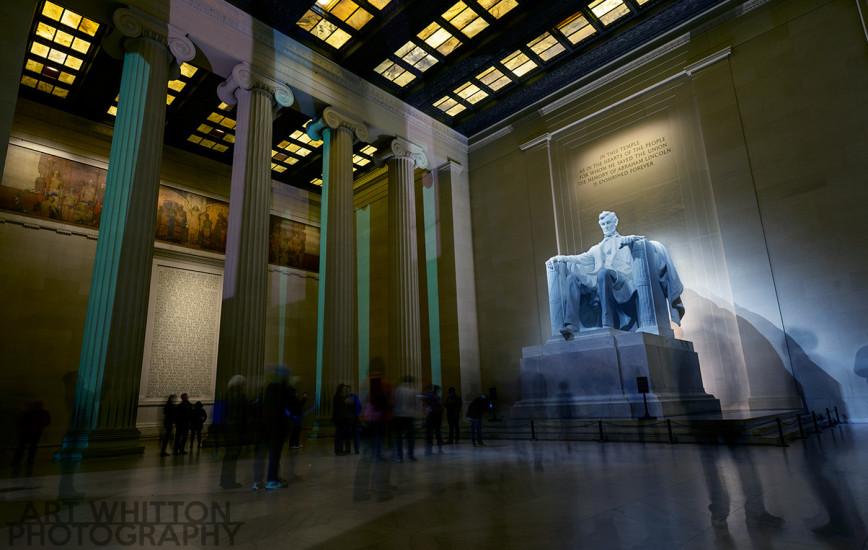
As you can see in the image above, there is light coming from a few directions and they cast green, yellow and white tones around the memorial. I shot this with a 20mm lens for 10 seconds to get the crowd blurred.
One thing about capturing long exposures with a crowd of people – watch for kids with lights in their sneakers!

Another view of the Lincoln Memorial is very similar to the daytime photo that I show above. If I compared the two shots, I’d say that this one packs a little more drama due to the lighting.
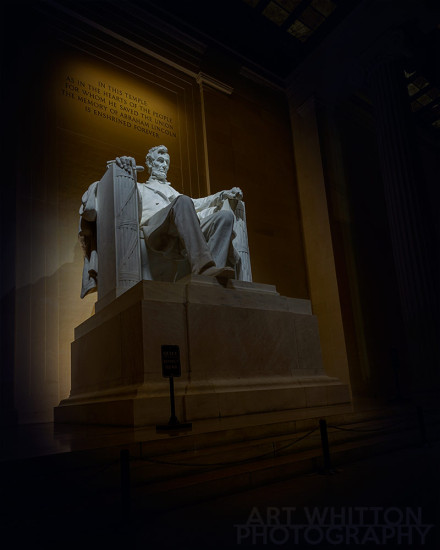
And one last shot of the Lincoln Memorial at night is this one showing the exterior.
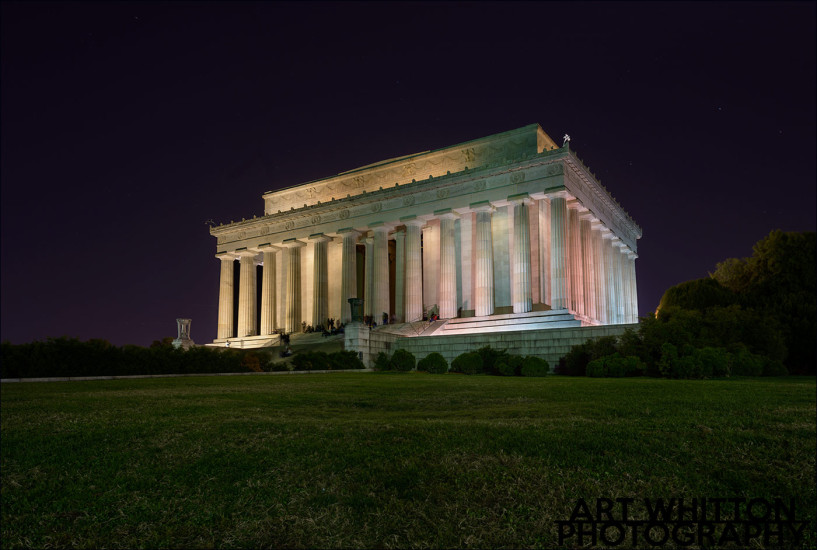
For this image, I combined two exposures so that I could get the building exposed properly (1.3 seconds) and also show the grass and surrounding area (30 seconds). Here’s a look at the two images (below) I used to make the final image (above).
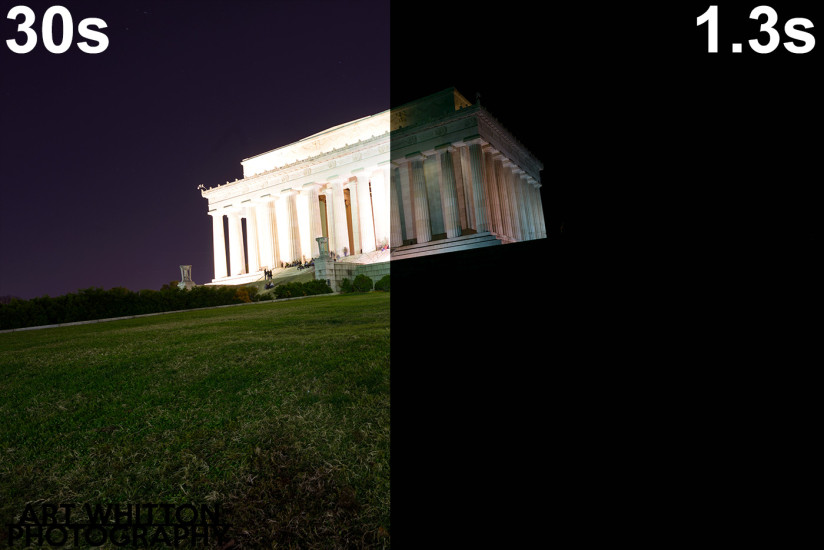
As you can see there are some situations where one exposure just won’t get the job done. Sometimes you can use graduated ND filters (physical or digital) but in this example it would have darkened the sky too much. I liked how the 30 second exposure gave me some color in the sky.
The last image I have in this post is of the Korean War Veterans Memorial. Shooting it at night wasn’t much easier than shooting it during the day due to the same reasons mentioned above.
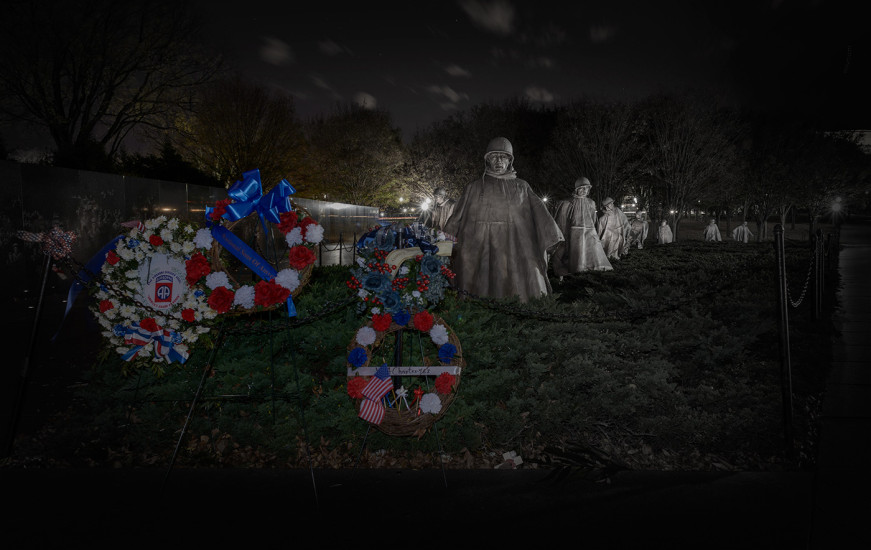
The wreathes were laid the two days before and were still fresh and colorful. With this image, I added some vignetting to darken the lights around the edges and subdued the colours to tone down the brightness of it all. The statues are also a little more ‘ghost-like’, but I still don’t think this image works as there is too much going on and the bright lights in the center are distracting. Maybe I’ll have this figured out the next time I visit.
This concludes Part 1 of my DC photo adventure. I’ll have Part 2 up in the next few days. If you have any questions or comments about these photos, please leave them below or email me: Art@ArtWhitton.com
Part Two is now complete and ready for your viewing pleasure.
Thank for reading,
- Art
One thought on “Photographing Washington DC – Pt 1”