This post is about some of the various ways that I use my flash. I’ll show a number of examples of how you can modify the effects of your flash using cheap (or inexpensive) accessories. I don’t mind spending money when I need to, but if I can turn something into a 99¢ camera accessory, I will. 😀
Introduction:
My gear might be Nikon, but this will apply to any camera brand. I’m using a Nikon D800e and a single SB-800 flash unit. The Nikon CLS (Creative Lighting System) allows me to put the flash off camera and trigger it remotely from the built-in flash in the camera. I can also control the power settings using the camera’s menu system. I love this set up. I have 3 of these flash units and can give each one a different power setting if I need to. But for now, let’s keep it simple with one flash so you can see the effects of each modifier on the image.
I’m not going to get into the technical details of how to set the flash, but if you have questions feel free to email me. All of these example images were shot on the same camera setting (Manual – f6.3 – 1/320s – ISO Lo.3 (~80) – White Balance: Flash – Nikkor 85mm 1.8 lens. All of the images are as they came out of the camera other than being cropped and resized to better fit on the page.
Some images will be overexposed and underexposed. I did that on purpose (honestly!) as I want you to see what the same settings with different accessories will give you.
What to look for in these examples:
When I am working with any light source, but flashes especially, I try to be aware of two things: shadows and reflections. Shadows can give your image depth and feeling, but can also cause important parts of the subject to appear too dark. Reflections can cause unwanted bright spots that detract from the photo. Moving and adjusting your flash unit allows you to control these two potential problems.
My Setup:
I pulled some random items for the shelves in my studio and put them on a hand painted backdrop. My camera was in front about 3 feet away and the flash was at a 45° angle 3 feet away to the right. I’ve read that if you keep your flash angled at least 45° from the camera, you’ll dramatically reduce reflections (and it seems to work!)

Ok – let’s go! Remember to look at overall exposure, shadows and reflections. Look for the harshness or softness of shadows and bright distraction reflections.
Example 1: Full on Flash – no modifier

This first image is typical of any first image I take. I shoot at 1:1 (Full power) to see where I can adjust to. In this case, there is no modifier, so the flash is pointed directly at the subject and overexposed.
Here’s the same set up with the flash turned down to 1:8 (1/8 of full power).

While it is MUCH better exposed, the lighting is still quite harsh. I purposely put the white car towards the flash so that any overexposure would be easily seen. Note the dark shadow on the left of the melon (and other objects). Consider this a ‘base point’ of flash photography (but still a little overexposed).
Example 1a: Change the Flash Distance
The one modifier that every flash unit has is also free! Just move the flash unit closer or further away from your subject. As you move closer, you’ll get more light and harsher shadows. As you move away, you’ll get less light and softer shadows.

The image above shows direct flash at 1:1 power from 6 feet away (double the 3 feet distance of the first image). The “inverse square law” tells us that as you double the distance between a light source and subject, you end up with 1/4 of the amount of light hitting the subject.
Here is another shot at 6 feet away, but with the power turned down to 1:4.

And of course you can move your flash to where ever you want. This example is the same setup, but with the flash moved to the left.
")
It’s easy to modify your flash just moving it and adjusting the power. These next examples will show the differences some simple accessories can make.
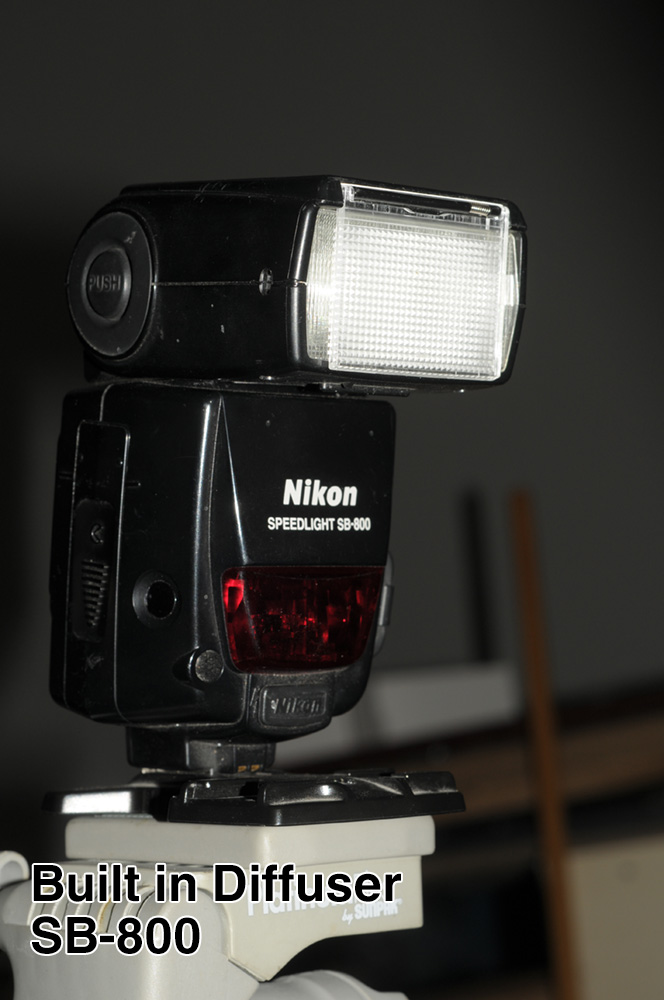
Example 2: Built in Diffuser – IMAGE
Many flashes like the SB-800 come with a built in diffuser that can slide out over the front of the flash. I will use this almost every time I use my flash. I will get a little bit softer light when I use it without much loss of light.

Notice how this image is a little darker than the one above? See how the car looks better exposed now? It was shot at the same 1:8 power, but diffused enough to make a difference. Everything looks a little softer.
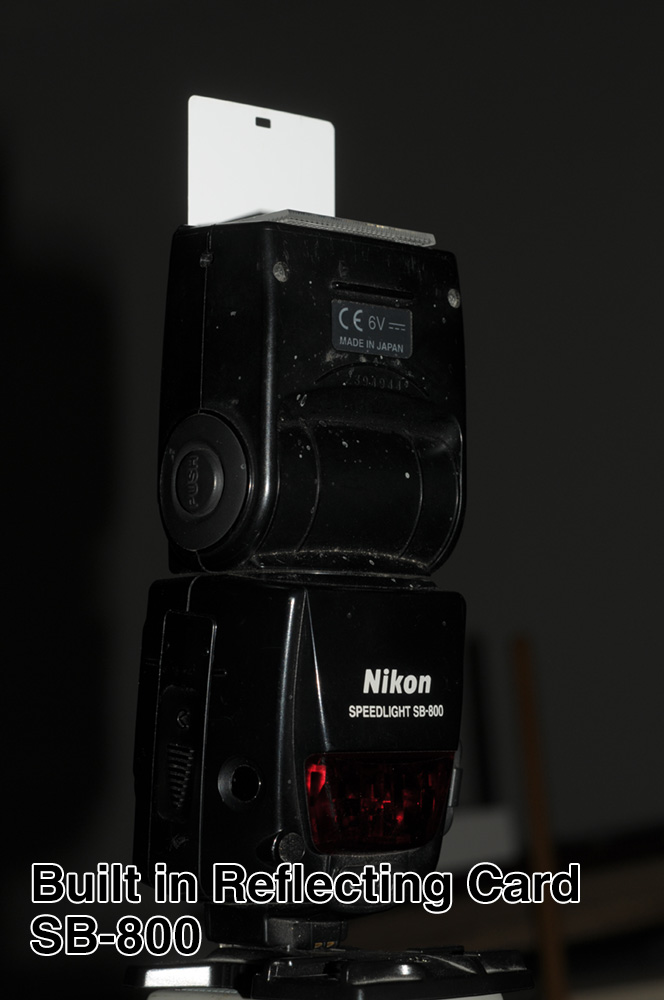
Example 3: Built in Bounce Card – IMAGE
Another option that I have built in to the SB-800 is a small white card that I can use to bounce the light off. This gives me an indirect light source. To use, I tilt the flash up 90° and extend the card. I’ll usually use the built in diffuser with this card.

For the above image, I left the power at 1:8 to show the amount of light that is lost when you point the flash straight up and bounce it off of a small card. Below is the same set up, but with the power of the flash set at 1:2 (half power)

Now I have much softer shadows, even lighting, no glare on the car – but still a little underexposed.
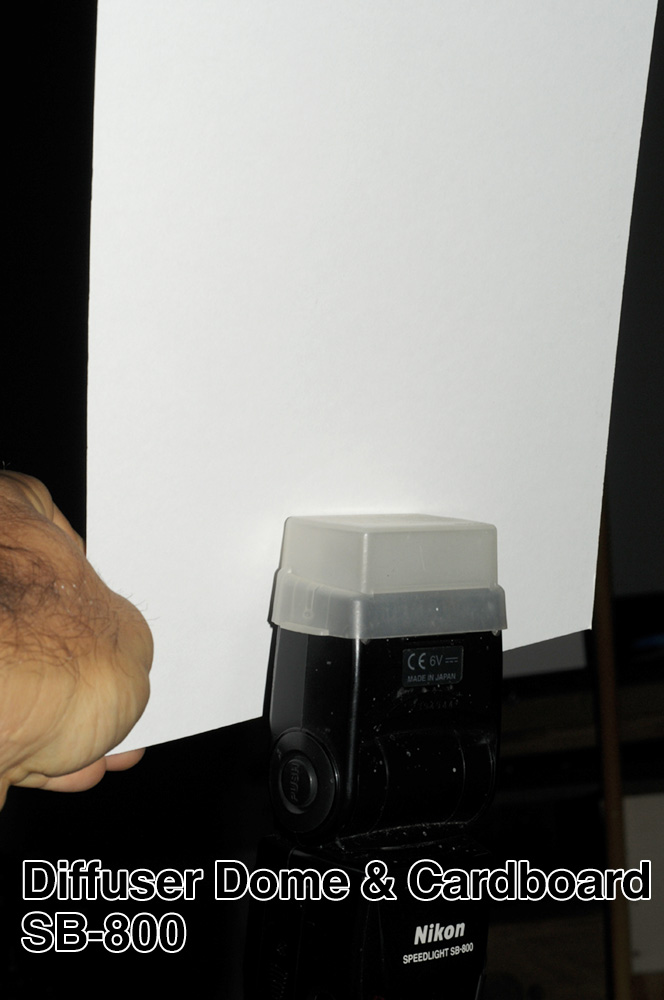
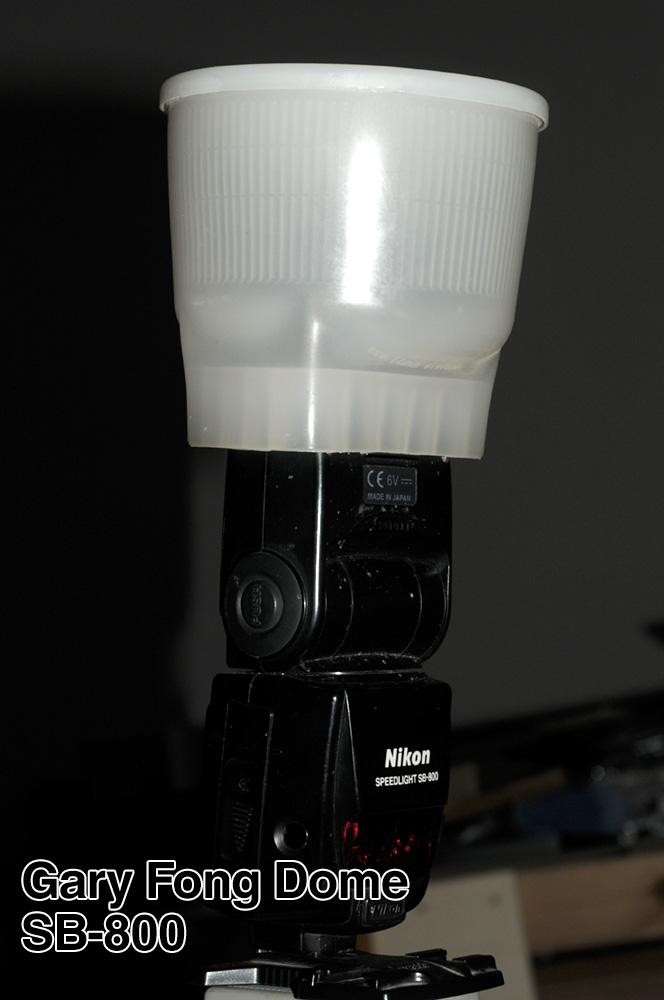
Example 4: Included Flash Dome Accessory IMAGE
The next accessory I used was the plastic dome that came with the flash. This is just diffuser that fits on the end of the flash head and softens the light in all directions. With the flash back on the right side again, I shot with the dome pointing at the subject at full power.

In this example, the light isn’t diffused very much. It’s a little softer than the first image at the top, but still over exposed at 1:1 power. Here is the same setup, but shot at 1:6.4 power.

Now’s it a better exposure, but still has harsh shadows. Another option I have is to tilt the flash head 90° (like I did with the built in card) and use the dome to diffuse the light in all directions.

Using the same power as shooting straight on, you can see how much light is lost when the flash points straight up. I have 14 foot ceilings in the studio, so I’m not getting much (if any) light bounced back down. If I had an 8 foot ceiling, I would get a little light from above.
Here’s the same set up with the flash set to 1:2 power. Notice how the shadows are a little softer, but I’m still underexposing the image.

At this point, you might see that there is a lot of experimentation that can be done to find the best set up for a new lighting situation. You might also need to consider that the more power that your flash uses, the faster the batteries drain and the longer it can take to recycle. I have a lot of charged rechargeable batteries ready to go at any time. I recommend the Eneloops by Sony as they hold their charge for a long time and last a decent amount of time in my flashes.
Example 5: Adding a White Cardboard Reflector – IMAGE
I cut my own frame mattes and usually use a white matte with a black core. The leftover center ‘scrap’ is perfect for flash diffusing. I end up with an 11×14 piece of cardboard that is white on one side and black on the other. I save these and use them in my macro work to control the light. I might use 6 or 7 and it looks like I’m building a house of cards sometimes, but they’re very effective at controlling light.

This is the exact same setup as the other image above, but all I did was hold up a piece of white board behind the flash for the light to bounce off and now I have nicely exposed image with softer shadows.
If I turn the card around and bounce the light off of the black side, the results are much different.

I’ve got a very soft light, but I’m underexposing the image now.
Example 6: Using a “Flash Sock” – IMAGE
There might be a technical name for these, but I just call them my flash socks. They are a small cloth diffuser that is white on all sides, but the outside back panel is black to throw more light forward. They attach to the flash head with their stretch band and so they’ll work on almost any flash. And they are CHEAP! ($5 at Amazon) This is one of the best dollar-to-use camera accessories that I have.

This is a quick easy way to get a softer light. For quick shots, I’ll line up 2 flashes (one on each side at 45°) with socks and shoot.
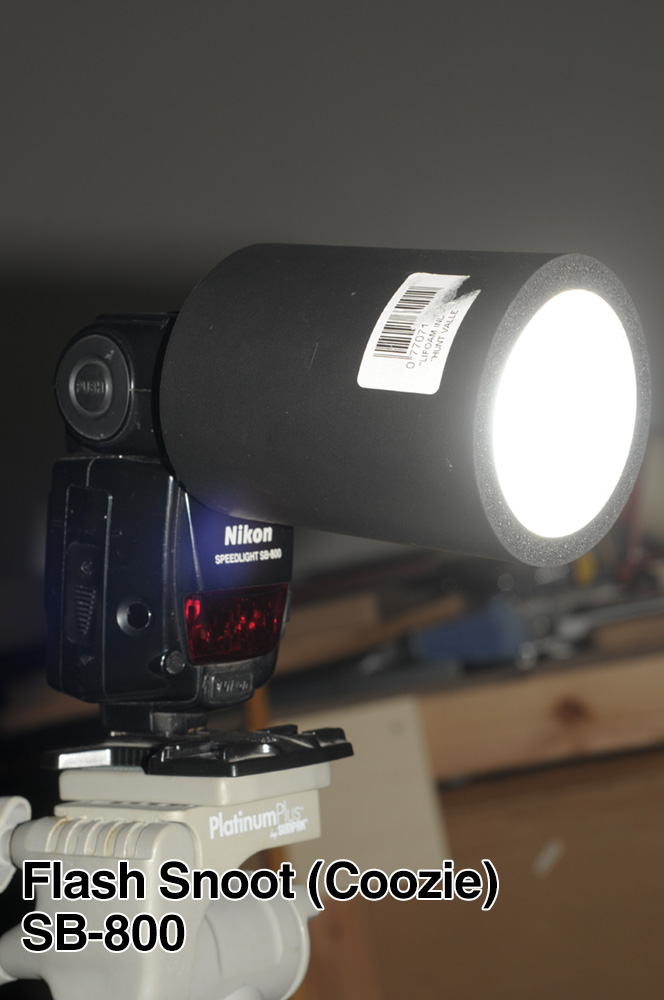
Example 7: Using a Snoot – IMAGE
If you look online, you can find all kinds of snoots (which are a cone to shoot light through) and they can cost about $20 and up. I made my own for 99¢ from a black foam drink ‘coozie’. In fact, I splurged and made 2! To make your own flash snoot, just buy a black coozie and tear the bottom out. Stick it on the flash head and shoot.
What a snoot does is concentrate the light into a tighter beam. This is the opposite of diffusing the light out into a wider area for softer shadows. Here’s a shot with the flash pointing at the subject and the snoot added at 1:2 power.

Notice how the background is dark as the light is funneled towards the center. The shadows are harsh and dark. Snoots can also be used to get a little more distance from a flash or when you want a direct hard light.
Example 8: Using a ‘Fong’ Dome – IMAGE
After the 99¢ snoot, this one will cost a little more. The Gary Fong dome will set you back about $55, but a lot of people like them. I don’t use this one a lot with macro work as I can’t adjust it much, but it does give off a nice diffusion.

Like the previous examples, this was shot at 1:2 (half) power. It’s a little underexposed, but has some nice soft shadows, the car isn’t burned out (overexposed) and the lighting is fairly even.
Here is the same set up but in this example, I place a white board behind the dome to reflect the otherwise lost light forward. More light, nice diffusion – maybe we’re learning something!

Example 9: LumiQuest Softbox – IMAGE
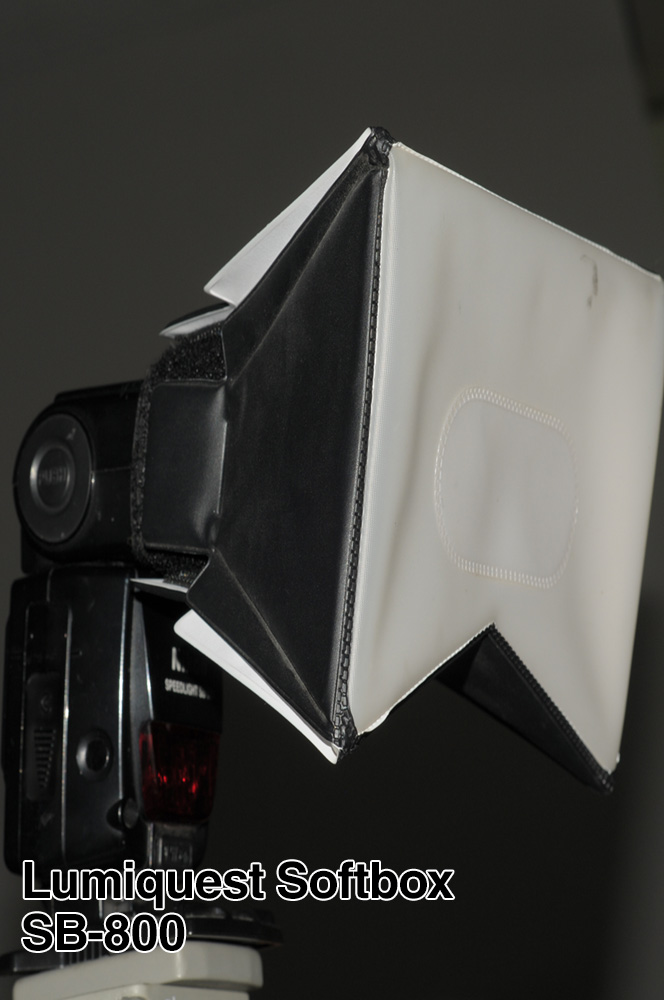
This is an accessory that I’ve have for over 30 years. It provides some soft light AND it folds flat to fit nicely in a camera bag. The LumiQuest Softbox attaches to most flashes using Velcro attachments, but I highly recommend getting a Velcro strap (adding Velcro to your flash might stop other accessories from fitting). The softbox I have is designed to work if you have your flash on the camera hot shoe, but they make a few different versions.

Here’s the softbox pointing at the subject with the same 1:2 power as the shots above. A little harsh, so let’s try again with less power.

Much nicer. You might have to really look at all of these examples, but the main thing to take away so far is that there are MANY ways to adjust the light coming out of your flash. You have a lot of options to get the effects that you want for each shot.
Example 10: LumiQuest Pocket Bouncer – IMAGE
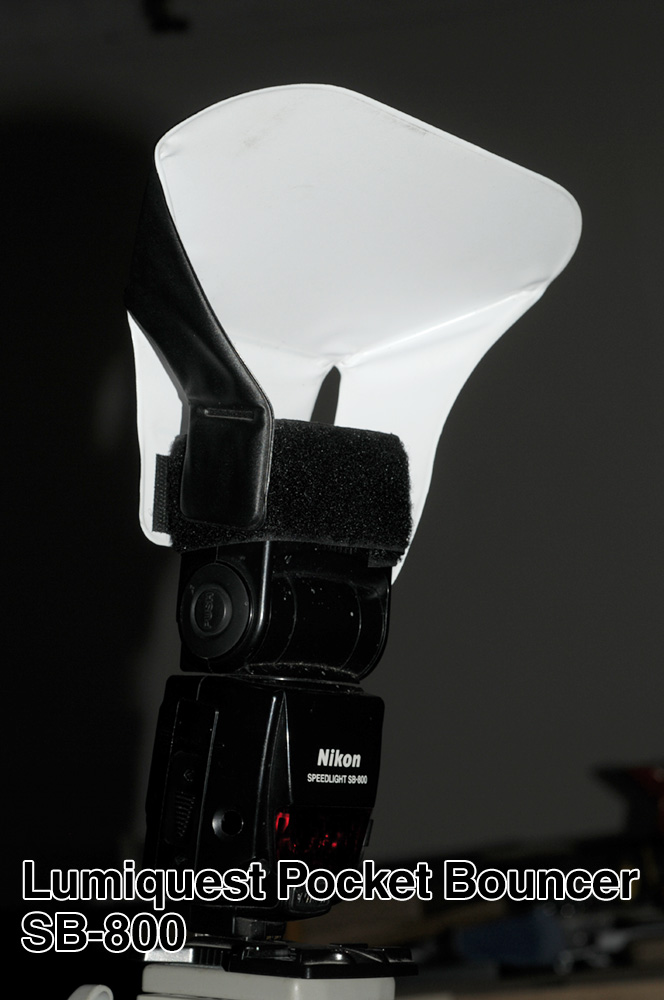
This is another accessory I’ve had for over 30 years. It’s compact and does a great job – that’s why it’s stuck around so long. The LumiQuest Pocket Bouncer is designed to bounce light from the flash when it’s pointing at the ceiling and deflect it to your subject.

I shot this at the same power (1:8) as the softbox. Without the light pointing directly at the subject, you will lose some and need to boost your power.
Example 11: Rogue FlashBender – IMAGE
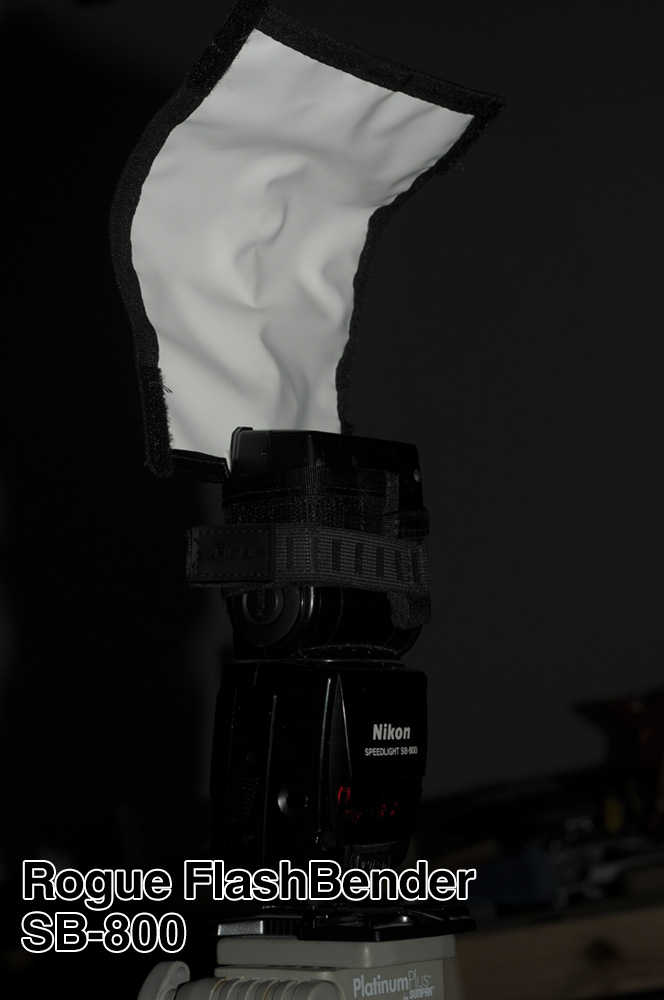
This last accessory is one bought a year or so ago and I really like it. The Rogue FlashBender is like a white card you can attach to the flash head, but like the name implies, you can bend it to shape your light. When I use this with macro subjects, I can fine tune the light to get it where I want it and make adjusts as I work. You can use the black side as well, but I haven’t found a need for that yet.
In the image below, I have the flash pointing at the (14′) ceiling, with the FlashBender used as a straight reflector (not bent) at 1:4 power.

For the next shot, I bent the top of the reflector down to concentrate more light at the subject. Notice the increase in light hitting the subjects?

NEW: Example 12: Newer Octagon Softbox
This one is my “go to” diffuser now. It gives a nice soft light and is also compact and easy to use. I use in the studio and recently started using it outdoors for ‘backyard bugs’. For $14, I’ve found this diffuser to be worth every penny.
Here’s an example of a studio shot – with the flash and diffuser held directly over the subject:
and here’s one shot outdoors:

Bonus Example: Adding a bounce card across from the flash
One final example, and once again this is a free accessory! One easy way to modify your light is to add a reflector across from the flash on the far side of you subject. This will reflect light back at your subject and lighten up the shadows on the far side. You can adjust the size of the card and the angle to get different effects.

Notice the lighter shadows and you can see more of the (fake) melon as well.
Summary:
Camera technology has come a long way since we stuck four sided flash cubes on the top of our cameras and hoped for the best. The main thing to remember from all of this is that you have OPTIONS. You can try all kinds of different effects and settings and use different modifiers, but the important things is to experiment and find out what you like and what tools you need to use to get the images you want.
I absolutely love the Nikon flash system. Having the power to adjust remote flashes makes shooting so much easier. Of course most DSLRs will allow some form of off-camera flash – even if it’s with a cable. I haven’t shot a frame with my flash in my hot shoe in years. I will occasionally use the built in flash for snapshots or when I’ve left the ‘big guns’ at home.
If you liked this, please leave a comment below. If you have a question, feel free to email me. If you think this post sucked, then you got what you paid for. 😉
For further reading check out one of Joe McNally’s books – he’s a Nikon flash guru (but his writing will appeal to all photographers).
Sketching Light: An Illustrated Tour of the Possibilities of Flash (Voices That Matter)
The Hot Shoe Diaries: Big Light from Small Flashes
Thanks for reading
Art Whitton
www.ArtWhitton.com